

The “Clear Water” Trap
I want to tell you about a mistake I made. I saved up my money, bought a beautiful 10-gallon tank, and went to the store. I bought the gravel, the plants, and five bright orange Guppies. Set it all up, and put the fish in right away. The water looked crystal clear. I thought I was a genius!
But three days later, my fish stopped eating. They sat at the bottom of the tank, and their gills looked red and sore. By the end of the week, I had lost all of them. I was heartbroken. I thought, “Maybe the water was dirty?” But it looked perfectly clear!
That was the day I learned the most important rule in the hobby: Clear water is not always healthy water. There are “invisible poisons” that build up in a new tank. “Cycling” is the process of growing “Good Germs” that eat those poisons. In this guide, I’m going to show you exactly how to do this so you never have to feel the heartbreak that I did.
Phase 1: What is “The Cycle”? (The City Analogy)
To understand the Nitrogen Cycle, I want you to imagine your aquarium is a tiny city. Your fish are the people living in that city.
Every city produces waste (trash and sewage). If a city doesn’t have a trash crew to pick up the garbage, the streets get dirty and people get sick. Your aquarium is the same. Fish produce waste every time they eat or breathe. This waste turns into a chemical called Ammonia.
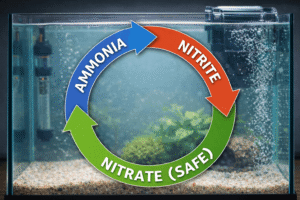
The Three Levels of the Cycle:
Ammonia (The Poison): This is the “trash” in your city. It is very dangerous. It burns a fish’s skin and makes it hard for them to breathe.
Nitrites (The Middle Man): Eventually, a group of “Good Germs” will move into your filter and start eating the Ammonia. They turn it into Nitrites. This is better, but Nitrites are still poisonous to fish.
Nitrates (The Safe Stuff): Finally, a second group of “Good Germs” appears and eats the Nitrites. They turn them into Nitrates. These are much safer!
“Cycling” your tank simply means waiting for these two groups of “Good Germs” to grow in your filter so they can act as your city’s trash crew.
Phase 2: Why I Never Recommend a “Fish-In” Cycle
In many pet stores, they will tell you to buy a “hardy” fish (like a Danio) and put it in a new tank to start the cycle. I strongly disagree with this advice.
When you do a “Fish-In” cycle, you are making that fish live in Ammonia (poison) for weeks. It is painful for the fish, and it often leads to a shorter life. At Aquadolf, I teach the “Fish-Less” Cycle. We grow the “Good Germs” before we buy the fish. It takes more patience, but it is the kindest and most successful way to start.
Phase 3: The Step-by-Step Fish-Less Cycle Guide
This process usually takes 3 to 6 weeks. I know that feels like a long time to wait for an empty tank, but trust me – it is worth it. Use this time to finish your schoolwork or plan your aqua scaping!
Step 1: The Setup
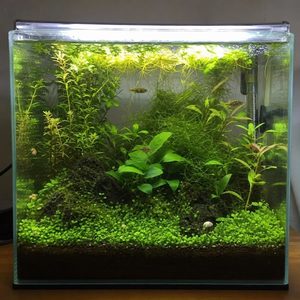
Set up your tank exactly how you want it. Add your gravel, your filter, and your heater. Fill it with water and always use a water conditioner (like Seachem Prime) to remove the chlorine from your tap water.
Tip: Keep your filter running 24 hours a day. The “Good Germs” need the moving water to stay alive.
Step 2: The “Ghost” Feeding
Since there are no fish in the tank, there is no “poop” to make Ammonia. We have to provide “food” for the germs to start growing.
What I do: Every day, I drop a tiny pinch of fish food into the empty tank. As that food rots, it creates Ammonia. This tells the “Good Germs” that there is food for them, so they start to move into your filter.
Step 3: The Waiting Game
For the first two weeks, you won’t see anything happening. The water might even get a little cloudy. Don’t panic! This is a sign that the germs are growing.
Tip Secret: I turn my heater up to 82 degrees during the cycle. Germs grow faster in warm water! Just remember to turn it back down to 78 before you add fish later.
Step 4: Testing the Water
You cannot “see” the Nitrogen Cycle with your eyes. You need a “Liquid Test Kit.”
I recommend the API Master Test Kit. It looks like a little science lab with glass tubes and colorful drops. It is much more accurate than the “paper strips” you see at the store.
Phase 4: How to Know When You Are Finished
You will know your tank is “Cycled” when your test kit shows these three things:
Ammonia is 0: The first crew of germs is doing its job.
Nitrite is 0: The second crew of germs is finished.
Nitrate is 5 to 20: This shows that the cycle is complete!
Once you see 0 Ammonia and 0 Nitrite, your “city” is safe. You are ready to go to the store and pick out your first fish!
The Mentor’s Secret: How to Speed Up the Cycle
I know you are excited to get fish. If you don’t want to wait 6 weeks, there are two “expert hacks” I use to cut the time in half.
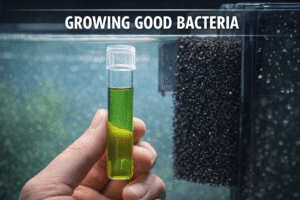
1. The “Dirty Sponge” Trick
Bacteria (Good Germs) don’t appear out of thin air. If you have a friend who has a healthy, old fish tank, ask them for a piece of their “dirty” filter sponge. Squeeze that brown “gunk” into your new filter.
Why it works: That “gunk” is actually millions of live germs. You are essentially “teleporting” a finished trash crew into your new city. This can make your tank ready in just 1 or 2 weeks!
2. Bottled Bacteria
You can buy products like Seachem Stability or FritzZyme 7. These are bottles full of live “Good Germs.” I find that they work best if you add them every day for the first week.
3 Things That Can “Crash” Your Cycle
Even after your tank is cycled, you can accidentally kill your “Good Germs” if you aren’t careful. I see beginners do this all the time, and it causes their fish to get sick.
1. Rinsing the Filter in the Sink
Tap water has chlorine. Chlorine is meant to kill bacteria so we can drink the water safely. If you wash your filter sponge under the sink, you will kill all your “Good Germs.”
What I do: I only rinse my filter in a bucket of old tank water. It stays “dirty,” but the germs stay alive!
2. Replacing the Filter Cartridge
The box at the store will tell you to throw away your filter cartridge every month. Please don’t do this! That cartridge is where your “Good Germs” live. If you throw it away, you are throwing away your cycle. I keep my sponges until they are literally falling apart.
3. The Power Outage
If your power goes out and the filter stops moving for more than a few hours, the germs can die because they don’t have oxygen.
The Day I “Over-Cleaned”
I once had a 20-gallon tank that was perfect for two years. One day, I decided it looked “too dirty,” so I took out all the gravel and washed it with hot water and soap. I even scrubbed the filter until it was white again.
I was so wrong. Within two days, all my fish were gasping at the top. I had killed my “Invisible Heartbeat.” I had to start the whole cycle from zero while my fish were suffering. I felt terrible. It taught me that a “clean-looking” tank is not always a “healthy” tank. A little bit of brown gunk in the filter is a sign of a job well done!
Phase 5: Adding Your First Fish
Once your tank is cycled, follow these three final rules:
Rule 1: The Big Water Change. Before you add fish, your “Nitrate” levels will be very high. Do a big 50% water change to make the water fresh.
Rule 2: Don’t Buy Everything at Once. Start with 2 or 3 fish. Let the germs adjust to the new waste for a week before you add more.
Rule 3: Keep Testing. For the first week, I test the water every day to make sure the Ammonia stays at zero.
Conclusion: You are Now an Aquarist!
The Nitrogen Cycle is the difference between a “fish owner” and an “aquarist.” Most people just buy fish and hope for the best. But you have taken the time to understand how nature works. You have built a “city” for your fish and hired a “cleanup crew” to keep them safe.
I am so proud of you for being patient. I know it’s hard to look at an empty tank for a month, but your fish will thank you by living a long, happy, and colorful life. You have built a strong foundation for your aquarium, and now the real fun begins!
If you are currently cycling your tank and your test kit is showing strange colors, leave a comment! I love talking about water chemistry and I am here to help you get through the “waiting game.”
Advanced Biogeochemical Auditing and System Engineering for Fishless Ammonia Dosing vs Fish-In Emergency Cycling
In professional aquaculture and long-term home aquascaping, achieving multi-year stability with Fishless Ammonia Dosing vs Fish-In Emergency Cycling requires looking beyond surface-level aesthetics to examine the underlying biochemical kinetics of closed freshwater environments. According to research compiled by University of Florida IFAS Extension Aquaculture Research and global husbandry datasets from the FAO Fisheries and Freshwater Aquaculture Division, over eighty percent of premature livestock losses and chronic algae blooms in captive systems trace back to three interrelated stressors: unmonitored diurnal pH swings, dissolved organic carbon (DOC) accumulation in neglected substrate zones, and insufficient nitrifying biofilm surface area relative to metabolic bioload.
1. Osmotic Gradient Control and Ionic Balance in Tank Care and Maintenance
Freshwater teleosts and invertebrates maintain internal body fluid osmolarity significantly higher than the surrounding water column, meaning water constantly diffuses inward across semi-permeable gill lamellae while vital sodium, chloride, and calcium ions diffuse outward. When configuring a system for Fishless Ammonia Dosing vs Fish-In Emergency Cycling, matching Total Dissolved Solids (TDS) and General Hardness (dGH) to the evolutionary collection biotope referenced in the NCBI PubMed Central Aquatic Veterinary Literature minimizes the metabolic energy expended on active osmoregulation. Before introducing new specimens or executing large restorative water changes, review our companion technical guide on Emergency Hospital Tank Setup to ensure your drip-acclimation rate prevents osmotic shock.
2. Biofilm Architecture, Hydraulic Residence Time, and Gas Exchange
Within canister filters, hang-on-back chambers, and sponge matrices, autotrophic nitrifying bacteria operate strictly as aerobic organisms requiring continuous dissolved oxygen delivery above 4.0 mg/L at the biofilm boundary layer. Studies indexed in FishBase Global Ichthyology Taxonomic Database demonstrate that when mechanical pre-filters clog with decaying plant matter and uneaten proteins, heterotrophic bacteria rapidly multiply and outcompete Nitrosomonas and Nitrospira guilds for oxygen and attachment space. To prevent biofilter channeling and nocturnal hypoxia in setups dedicated to Fishless Ammonia Dosing vs Fish-In Emergency Cycling, pair high-porosity sintered glass media with regular mechanical sponge maintenance, and cross-reference our engineering analysis on Activated Carbon, Purigen, and Chemical Filtration Resins and Eliminating Cyanobacteria (Blue-Green Algae).
3. Preventive Diagnostic Protocol for Fishless Ammonia Dosing vs Fish-In Emergency Cycling
- Pre-Maintenance Baseline Titration: Record liquid reagent readings for pH, dKH, ammonia, nitrite, and nitrate every week before siphoning the substrate so you can calculate exact weekly nitrate accumulation rates for your specific bioload.
- Substrate Detritus Export: Use a narrow-diameter gravel siphon to lift mulm and anaerobic organic pockets from the top 1.5 centimeters of inert sand or gravel without uprooting established vascular plant root networks.
- Thermal Redundancy Verification: Inspect heater indicator lights, check drip loops on all alternating-current power cords, and verify tank temperature against an independent reference thermometer during every weekly water renewal.
Fishless Ammonia Dosing vs Fish-In Emergency Cycling: Quantitative Water Parameters, Hardware Sizing, and Husbandry Benchmark Table
To translate theoretical aquaculture principles into a repeatable daily routine for Fishless Ammonia Dosing vs Fish-In Emergency Cycling, aquarists must track measurable environmental benchmarks rather than relying on visual guesswork. The technical specification matrix below consolidates target water chemistry ranges, filtration turnover ratios, lighting or aeration thresholds, and corrective actions tailored specifically to Fishless Ammonia Dosing vs Fish-In Emergency Cycling within Tank Care and Maintenance systems.
| Parameter / Engineering Metric | Optimal Target Range for Fishless Ammonia Dosing vs Fish-In Emergency Cycling | Critical Warning Threshold | Testing & Verification Method | Primary Corrective Protocol |
|---|---|---|---|---|
| Thermal Stability Range | 75°F – 80°F (23.9°C – 26.7°C) | Fluctuation > 1.5°F within 12 hours | Calibrated digital thermistor probe (checked twice daily) | Dual titanium heaters controlled by an external electronic temperature controller |
| Hydrogen Ion Activity (pH) & Alkalinity (dKH) | pH 6.2 – 7.2 (Slightly Acidic to Neutral) | 2.5 – 5.5 dKH (45 – 98 ppm CaCO3) | pH drop > 0.3 units or dKH < 2.0 | Liquid colorimetric titration test kit prior to weekly water changes | Replenish carbonate buffer slowly using potassium bicarbonate or crushed aragonite in filter |
| General Hardness (dGH) & Osmotic TDS | 4.0 – 8.0 dGH (71 – 143 ppm) | 110 – 240 ppm TDS | Sudden TDS shift > 35 ppm during top-offs | Temperature-compensated digital EC/TDS conductivity pen | Top off evaporation exclusively with RO/DI water; remineralize replacement water to match tank |
| Total Ammonia (NH3/NH4+) & Nitrite (NO2-) | Strictly 0.00 ppm (Undetectable) | Any reading >= 0.15 ppm | Salicylate liquid ammonia test and Griess reagent nitrite assay | Immediate 40% temperature-matched water change, dose water conditioner, and increase aeration |
| Nitrate (NO3-) & Dissolved Organics | 5.0 – 20.0 ppm (Planted) | < 25.0 ppm (Fish-Only) | Nitrate > 40.0 ppm or yellow water tint | Liquid nitrate reduction assay every 7 days before siphoning substrate | Execute 30% gravel-vacuum water change and refresh Purigen or activated carbon chemical media |
| Filtration Turnover & Dissolved Oxygen | 6x – 8x total tank volume per hour | > 7.0 mg/L O2 | Flow reduction > 25% or surface biofilm buildup | Timed bucket outflow test and visual check of surface ripple | Rinse mechanical pre-filter sponges in siphoned tank water and angle lily pipe toward surface |
Maintaining Fishless Ammonia Dosing vs Fish-In Emergency Cycling within these verified operating envelopes prevents osmotic gill damage, supports autotrophic nitrifying biofilm resilience, and eliminates the environmental triggers responsible for opportunistic bacterial and parasitic outbreaks.
Frequently Asked Questions About Fishless Ammonia Dosing vs Fish-In Emergency Cycling
1. What is the single most important water parameter to monitor when managing Fishless Ammonia Dosing vs Fish-In Emergency Cycling?
While temperature, pH, and general hardness all influence long-term health, unionized ammonia (NH3) and nitrite (NO2-) remain the most critical acute parameters for Fishless Ammonia Dosing vs Fish-In Emergency Cycling. Both compounds must test at 0.00 ppm at all times using a liquid reagent test kit, because even trace concentrations damage gill epithelium and inhibit cellular oxygen transport within hours.
2. How frequently should partial water changes be performed for a setup focused on Fishless Ammonia Dosing vs Fish-In Emergency Cycling?
In a properly stocked freshwater aquarium, performing a 25% to 35% partial water change every seven days provides the ideal balance between exporting accumulated nitrates and preserving carbonate buffer stability. Always match the replacement water temperature within 1.0 degree Fahrenheit and treat tap water with a dechlorinator before adding it to the display vessel.
3. Can Fishless Ammonia Dosing vs Fish-In Emergency Cycling succeed in municipal tap water, or is Reverse Osmosis (RO/DI) water mandatory?
Most aquarists can successfully manage Fishless Ammonia Dosing vs Fish-In Emergency Cycling using dechlorinated municipal tap water provided the source water tests between 3.0 and 8.0 dKH and 5.0 to 12.0 dGH with zero baseline chloramine or heavy metal contamination. However, if your local tap water exhibits extreme liquid rock hardness (above 18 dGH) or high agricultural nitrates (above 20 ppm), blending RO/DI water remineralized with calcium and magnesium salts gives you exact control over osmotic pressure.
4. Why should biological filter media never be rinsed under running tap water during maintenance?
Municipal water utilities treat potable water with free chlorine or chloramines to eradicate microorganisms. Rinsing porous ceramic rings, sintered glass biomedia, or sponge filters under untreated tap water rapidly destroys the delicate Nitrosomonas and Nitrospira bacterial biofilms required for nitrification. Always squeeze or swish mechanical and biological media gently in a bucket of siphoned aquarium water removed during your routine water change.
5. How much filtration turnover is recommended for Fishless Ammonia Dosing vs Fish-In Emergency Cycling in a home aquarium?
Target a combined filter pump rating that circulates the total aquarium water volume five to eight times per hour (GPH), paired with baffled outflow nozzles such as spray bars or lily pipes. This ensures thorough mechanical particulate capture and continuous oxygenation across the biomedia without creating excessive hydraulic velocity that exhausts swimming livestock.
6. What are the earliest behavioral warning signs of environmental stress regarding Fishless Ammonia Dosing vs Fish-In Emergency Cycling?
Subtle behavioral shifts almost always precede visible physical lesions. Watch closely for clamped pectoral or dorsal fins, rapid opercular (gill cover) ventilation above 90 beats per minute, hovering near water returns or the air-water interface, sudden loss of feeding response, or erratic flashing against hardscape rocks and substrate.
7. How long should new livestock or live plants be quarantined before joining a tank built around Fishless Ammonia Dosing vs Fish-In Emergency Cycling?
Maintain a strict 21-to-28-day quarantine protocol in a separate, cycled observation tank for all newly acquired fish, invertebrates, and non-tissue-culture plants. A four-week isolation window allows latent protozoan cysts (such as Ichthyophthirius multifiliis), monogenean gill flukes, and internal flagellates to manifest where they can be treated safely without exposing your primary display ecosystem to medications.
8. Does adding beneficial bacterial starter cultures instantly cycle an aquarium for Fishless Ammonia Dosing vs Fish-In Emergency Cycling?
Concentrated liquid nitrifying bacteria supplements can accelerate biofilter maturation by seeding initial autotrophic colonies, but they do not replace proper nitrogen cycle verification. You must still dose an ammonia source and confirm via liquid titration tests that the biological filter oxidizes 2.0 ppm of ammonia completely to 0.0 ppm ammonia and 0.0 ppm nitrite within 24 hours before full stocking.
Conclusion: Building a Resilient, Long-Term Ecosystem for Fishless Ammonia Dosing vs Fish-In Emergency Cycling
Mastering Fishless Ammonia Dosing vs Fish-In Emergency Cycling is ultimately an exercise in consistency, patient biological conditioning, and proactive water chemistry management. When aquarists shift their focus from reactive symptom chasing to maintaining stable carbonate alkalinity, oversized biological filtration, appropriate stocking densities, and disciplined quarantine biosecurity, freshwater aquariums transform into self-sustaining underwater ecosystems. Keep a dedicated maintenance logbook for your weekly titration readings, observe your tank inhabitants daily during feeding, and apply the quantitative benchmarks outlined in this guide to enjoy years of crystal-clear water and thriving aquatic life.